
Currently, I am using Geany Editor on my Raspberry Pi to edit the source code. It is a lightweight IDE that comes with its own plugin system. While you are working on the Pi, you may want to know how to use Geany on Raspberry Pi.
The Raspberry Pi is a tiny, affordable, and great-performing computer. With a small form factor, low power consumption, and a plethora of GPIO pins, it’s the best choice for embedded projects. In this tutorial, you will learn how to install Geany on a Raspberry Pi.
This post will guide you through how to use Geany on Raspberry Pi. Step by step with pictures.
Geany is a lightweight text editor, pre-installed on your Raspberry Pi, that allows you to write code in Python or another language. I’ve been using Geany for years on my Ubuntu PC at work. In this article, I share some tips to get you started with Geany on your Raspberry Pi. Geany is a robust editor to use on the Raspberry Pi, as it comes pre-installed in the Raspberry Pi operating system and is ideal for writing Python or C/C++ code.
There is a built-in terminal to compile and run scripts directly in, and many other time-saving settings for coding (such as keyboard shortcuts and performance options). In this article, I will start with the basics and give you some other useful tips on how to do more with Geany on your Raspberry Pi.
How do I install Geany on my Raspberry Pi?
Geany is preinstalled on the Raspberry Pi OS with a desktop. It can be found in the main menu under Programming, along with other development tools such as Thonny Python IDE, Scratch and BlueJ Java IDE. So there’s nothing to do about it, in this version it’s readily available.
Open the main menu (top left of the screen), select Programming and then Geany Programmer’s Editor. alt= width=412 height=105 data-ez= data-ezsrc=http://server.digimetriq.com/wp-content/uploads/2021/05/How-to-Use-Geany-on-Raspberry-Pi-Full-guide-with.jpg />
Installing Geany on other distributions
If you are using a different Debian-based distribution, you should check your package manager. If apt is available in your distribution, you can install Geany with: sudo apt install geany If you are on another system, another option is to go directly to the official website and download the installer or source code.
Geany is also available for Windows and macOS, so you can use it on your computer too if you like it. Raspberry Pi Bootcamp sale: 10% off today. Take it to the next level. I’m here to help you get started with your Raspberry Pi. Learn all the necessary skills in the right order.
First steps with Geany
We’ll take a closer look at the interface later in this article, but at first launch the Geany interface looks like this: alt= width=904 height=636 data-ez= data-ezsrc=http://server.digimetriq.com/wp-content/uploads/2021/05/1622188240_344_How-to-Use-Geany-on-Raspberry-Pi-Full-guide-with.jpg /> This is the standard for a code editor.
You publish the source code in the main section. On the left is the browser to view your files and variables. At the top is the main menu with the most important shortcuts (these can be customized). The bottom part is also interesting, as it allows you to browse through the logs and have a terminal on hand to run your scripts (ideal for Python, for example).
What is Geany for?
Geany is a lightweight text editor that supports over 50 programming languages. So you can use it for almost anything related to programming. On the Raspberry Pi, you can also use it as a text editor, as it is more powerful than the default text editor (found in the main menu > Accessories).
Is Geany a good IDE?
Geany is a robust IDE that can be used with the most common programming languages (Python, C, PHP, Java, etc.). It is more powerful than simple text editors and less cumbersome than other solutions like PyCharm or Eclipse. Overall, this is an excellent solution for most programmers. As I mentioned at the beginning of this article, I have been using Geany at work for several years. I was a PHP developer at the time, working on Linux. I tried several solutions and Geany was able to do everything I needed.
Stability and performance were my main criteria, and Geany was perfect for that. After that I didn’t use it anymore because I switched to Windows and tried other solutions at the same time (like SublimeText and PHPStorm). If you spend 8 hours a day programming, a heavier solution can add some nice features that Geany doesn’t have, but if you’re using it on a Raspberry Pi, Geany is excellent. These days I mainly use Visual Studio Code, so I’d rather have it on my Raspberry Pi, but that’s mostly a matter of habit and not a limitation of Geany’s capabilities. VS Code can do more with all the extra packages, but you don’t necessarily need them to create a simple Python script on your Raspberry Pi.
In short, if you are used to another editor, try this one first, you will save time. If you are looking for a new editor, start your first scripts with Thonny (single files), and switch to Geany for larger projects (multiple files). If you use your Raspberry Pi mainly for programming, you can look for other alternatives by reading this article with the best text editors for your Raspberry Pi.
Is Geany a good solution for writing Python code?

The Geany IDE can run Python scripts in its native language, and since it comes pre-installed on the Raspberry Pi operating system, it’s a great solution for writing Python code, especially for beginners. Here is a simple example: alt= width=1024 height=409 data-ez= data-ezsrc=http://server.digimetriq.com/wp-content/uploads/2021/05/1622188241_641_How-to-Use-Geany-on-Raspberry-Pi-Full-guide-with.jpg /> You can use the shortcut in the Run menu to open your script in a new terminal, or you can use the handy Terminal tab at the bottom of the editor to run it directly from there.
I recommend turning on the Follow Current File Path option in Settings>Terminal so that the terminal is always in the right place to run your scripts. Geany is a good solution for Python! For example, autofill is available for this language, but you don’t have all the advanced features (at least not by default). It’s a great tool for beginners, but probably not enough for experienced users.
Is Geany a good solution for C/C++ code?
Geany is a good solution for C and C++ programmers, it is a simple IDE compared to competitors, but it includes the most important features like color highlighting, autocomplete and build/execute with one click. I don’t know if many of you program in C on your Raspberry Pi, but you can certainly use Geany for that. It has the same advantages as Python.
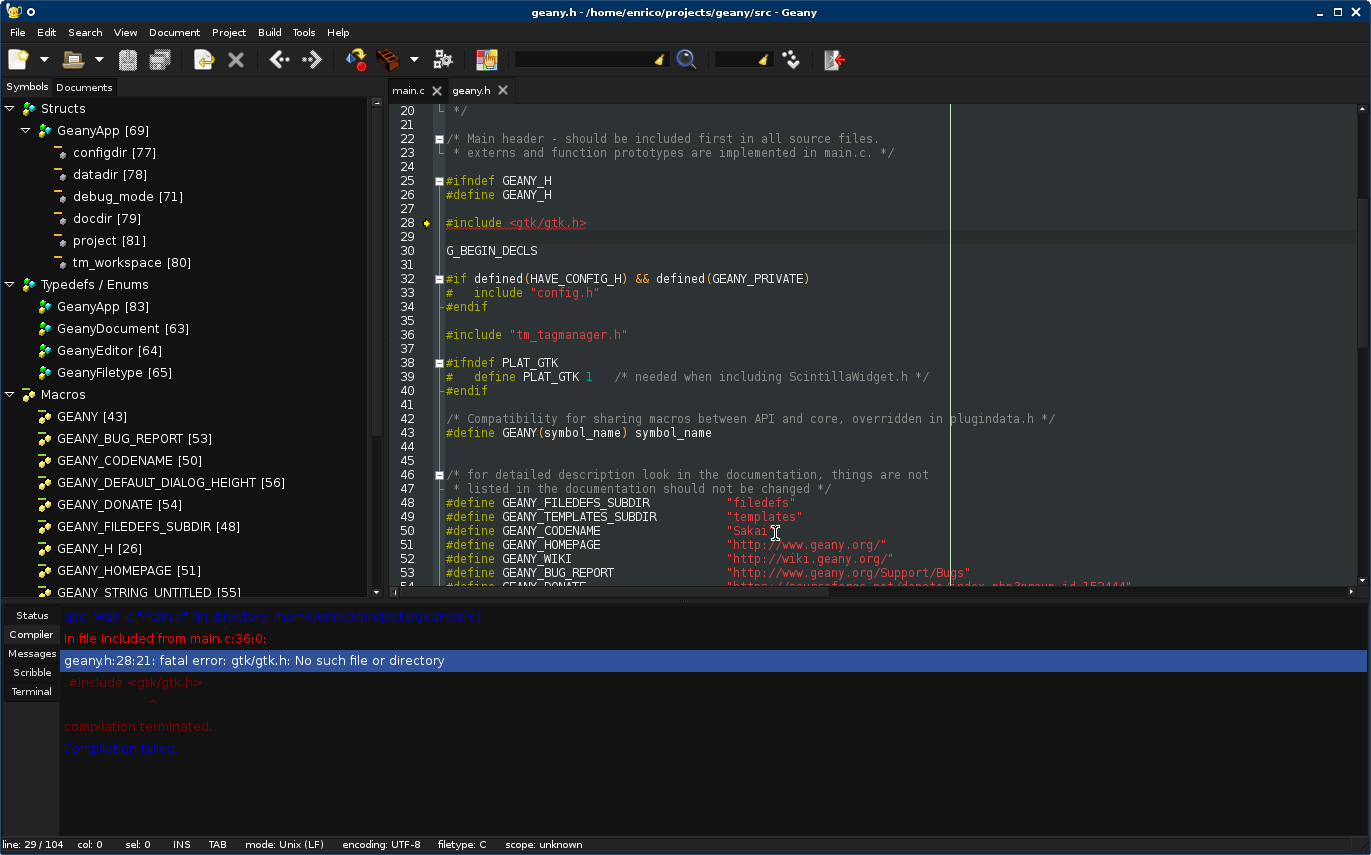
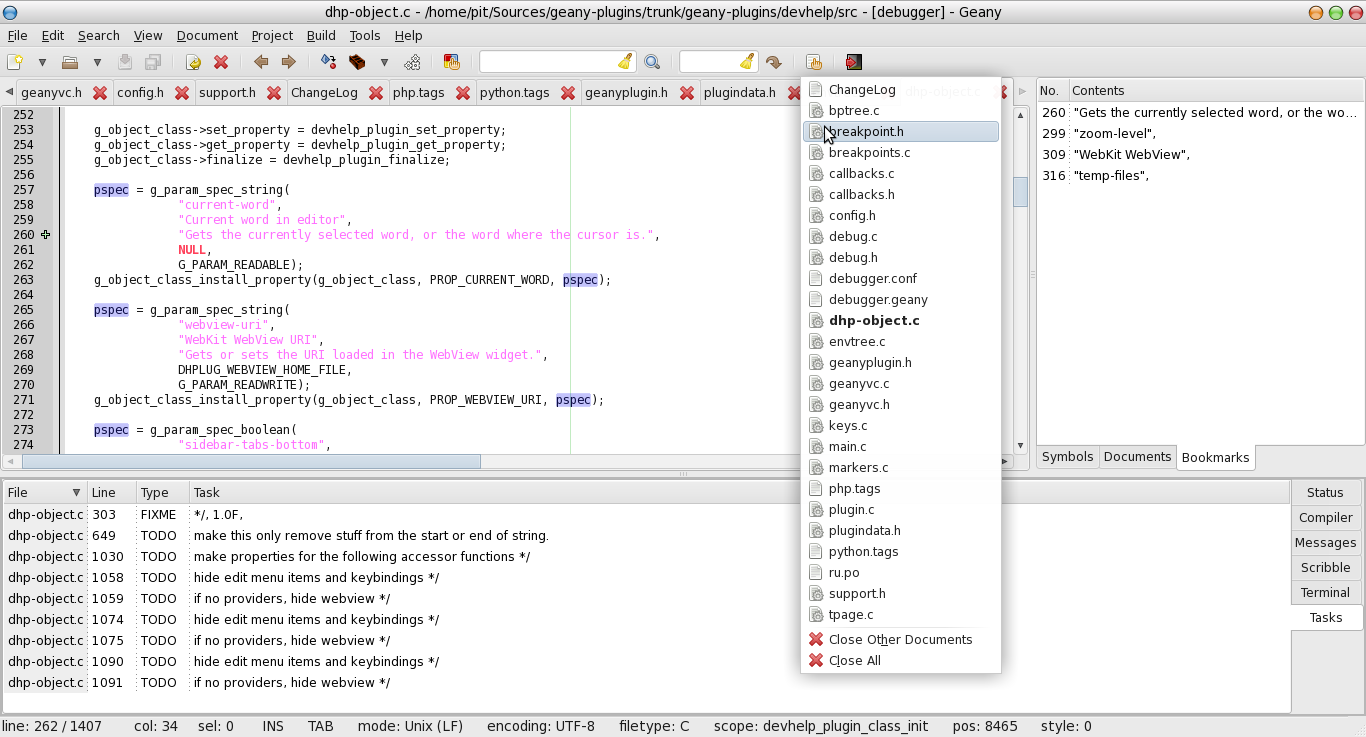
This is what it looks like: alt= width=901 height=531 data-ez= data-ezsrc=http://server.digimetriq.com/wp-content/uploads/2021/05/1622188242_812_How-to-Use-Geany-on-Raspberry-Pi-Full-guide-with.jpg /> Three shortcut icons in the top bar give you all the options you need to compile, build and run your code with one click. No need to memorize commands and type them into the terminal, Geany does it all for you. alt= width=307 height=197 data-ez= data-ezsrc=http://server.digimetriq.com/wp-content/uploads/2021/05/1622188242_190_How-to-Use-Geany-on-Raspberry-Pi-Full-guide-with.jpg /> You can see the result of each action (and the corresponding errors^^) on the Compiler tab at the bottom of the screen (as shown in the first screenshot).
I don’t use C++ much, but I think the recommendation is the same as for other languages. Geany is ideal for beginners, while experts will probably miss some interesting features. By the way, you should take a look at the Preferences configuration, as many options can be set there (e.g. keyboard shortcuts for basic actions, which we’ll see later). You can also go to Build > Set Build Commands if you want to use other commands for this: alt= width=622 height=218 data-ez= data-ezsrc=http://server.digimetriq.com/wp-content/uploads/2021/05/1622188243_238_How-to-Use-Geany-on-Raspberry-Pi-Full-guide-with.jpg />
Tips for using Geany on your Raspberry Pi

As we have said many times before, Geany is a great text editor for beginners, it is easy to use and can perform the most common functions quickly. If you are looking for additional features, you have come to the right place! Read on and I’ll give you some tips you can use to do more with Geany. Master your Raspberry Pi in 30 days Sale: 10% off today. Download eBook. Unlock the secrets of the Raspberry Pi in 30 days. Learn useful Linux skills and practice some projects.
Creating a new project in Geany
The first thing you can do to push the boundaries is create projects. As in most other editors, you can group files into a folder. Here’s how to do that with Geany:
- Open Geany.
- Click on Project > New in the main menu.
- Select a project name. Geany automatically fills in the project path, but you can change it if you wish: alt= width=463 height=186 data-ez= data-ezsrc=http://server.digimetriq.com/wp-content/uploads/2021/05/1622188244_452_How-to-Use-Geany-on-Raspberry-Pi-Full-guide-with.jpg />
- Click New to create a new project in Geany.
Then every new file you create will be stored in this project, which is very useful for linking all the files together, no matter what language you use. The left panel also toggles to show your project files: alt= width=417 height=111 data-ez= data-ezsrc=http://server.digimetriq.com/wp-content/uploads/2021/05/1622188245_778_How-to-Use-Geany-on-Raspberry-Pi-Full-guide-with.jpg />
Installing plug-ins in Geany
I haven’t mentioned it yet, but there are some plugins you can download and install on Geany. If you’re missing a particular feature, feel free to check out the list of plugins here before switching to another editor.
The easiest way to install all Geany plugins is to do it with APT in the terminal on the Raspberry Pi OS: sudo apt install geany-plugins It is also possible to install a single plugin with the following syntax: sudo apt install geany-plugin- For example: sudo apt install geany-plugin-autoclose You can use this command to get a list of all available plugins: sudo apt search geany-plugin Or use the Add/Remove Software tool in the main menu. Once installed, you can enable or disable them under Tools > Plugin Manager. alt= width=530 height=479 data-ez= data-ezsrc=http://server.digimetriq.com/wp-content/uploads/2021/05/1622188246_703_How-to-Use-Geany-on-Raspberry-Pi-Full-guide-with.jpg />
Dark mode and themes in Geany
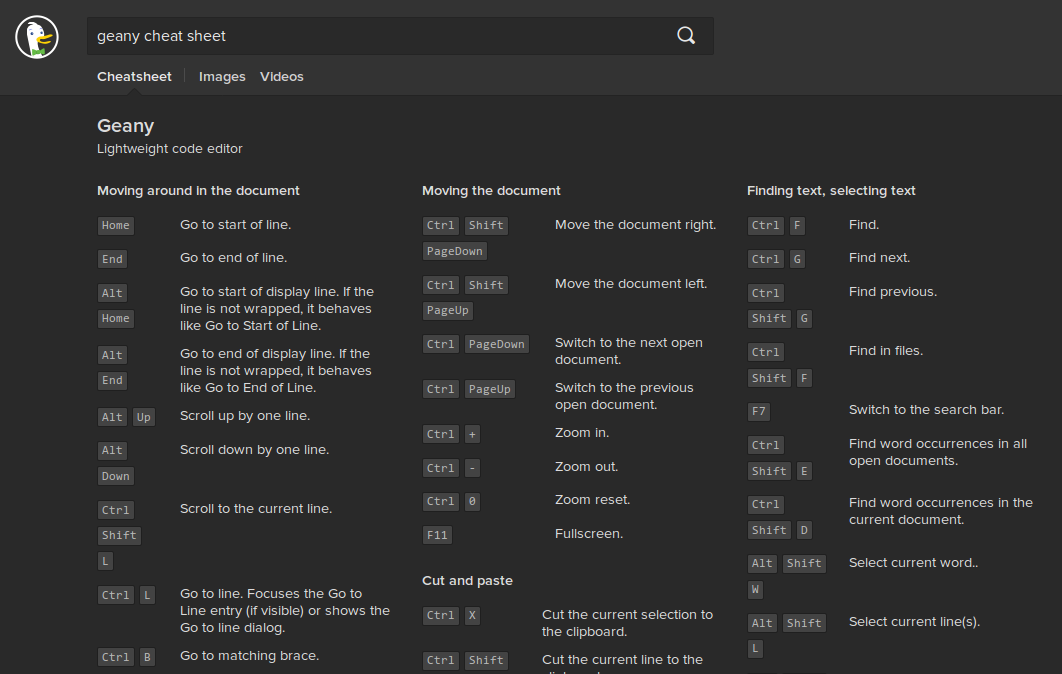
Geany also supports themes, so you can enable dark mode by using a dark theme. It also changes the default color selection so you can find what you like best. You can also find a list of topics on the official website here. alt= width=1024 height=490 data-ez= data-ezsrc=http://server.digimetriq.com/wp-content/uploads/2021/05/1622188247_723_How-to-Use-Geany-on-Raspberry-Pi-Full-guide-with.jpg /> Here you will learn how to install a theme on Geany :
- Go to the theme download page on the Geany website.
- Click the Download button next to the theme you want to install.
- This will open the configuration file in your browser, right click and then click Save As.
- Save the theme.conf file in the /home/pi/.config/geany/colorschemes directory. alt= width=725 height=211 data-ez= data-ezsrc=http://server.digimetriq.com/wp-content/uploads/2021/05/1622188247_896_How-to-Use-Geany-on-Raspberry-Pi-Full-guide-with.jpg /> You will need to use CTRL+H to show the hidden folders (.config), and you will probably need to create a colorschemes folder for the first folder.
- Next, open Geany and go to View > Edit Color Scheme.
- From here you can choose a theme to use: alt= width=1081 height=581 data-ez= data-ezsrc=http://server.digimetriq.com/wp-content/uploads/2021/05/1622188249_736_How-to-Use-Geany-on-Raspberry-Pi-Full-guide-with.jpg />
That’s it. You can do the same with another theme if you want, until you find the one that suits you perfectly :). You can change the configuration file if you want to change one or two colors, but it is not necessary.
Using debug mode in Geany
This tip is simple, but a little mysterious, so I think it’s best to share it with you. To enable debug mode in Geany, open the Tools menu and the Plugin Manager. Then check the debugger plugin to enable it, as it is not enabled by default.
The debugger plugin can be downloaded here if needed. It seems that the debugger plugin is not currently available in the Raspberry Pi OS repository, so the only way to make it work on the Raspberry Pi is to install Geany and the plugin from source.
Configuring keyboard shortcuts in Geany
A simple tip that can easily be overlooked. In the Geany Options window, you can configure keyboard shortcuts for almost any action in the editor. Open the Edit > Preferences window and click the Keyboard Assignment tab. It looks like this: alt= width=823 height=456 data-ez= data-ezsrc=http://server.digimetriq.com/wp-content/uploads/2021/05/1622188249_710_How-to-Use-Geany-on-Raspberry-Pi-Full-guide-with.jpg /> Write down the keyboard shortcuts for the actions you use most often, and feel free to add new ones for some others.
Other setting parameters
Within these settings, there are many other options you can customize to improve your Geany experience. For example, you can change the default font, template data, or even the appearance of the terminal. If you use Geany regularly for code projects, I strongly recommend that you take the time to go through all the available settings. You’ll end up saving time and having even more fun with this tool ?
Alternatives to Geany for Raspberry Pi Code
Geany is an ideal solution for most Raspberry Pi users. If Python is completely new to you, Thonny might be a better place to start. When you’re more advanced, you can try something better. In any case, there are many text editors available on the Raspberry Pi. You can find my recommendations in this detailed article and give it a try! If you prefer to use simple command line editors, I also have some good advice for you:
Raspberry Pi resources

Don’t know where to start? Understand everything about the Raspberry Pi, stop constantly looking for help and finally have fun with your projects. Check out the Raspberry Pi Bootcamp course now. Learn the Raspberry Pi in 30 days Want to learn more than the basics?
If you are looking for the best tips on how to become a Raspberry Pi expert, this is the book for you. Learn useful Linux skills and put various projects into practice with step-by-step tutorials. Download the e-book On this page you will also find all my recommendations for tools and equipment.In this article, I will show you how to use Geany on Raspberry Pi..
Read more about code::blocks raspberry pi tutorial and let us know what you think.
Frequently Asked Questions
How do I work for geany?
If you are using a raspberry pi with geany as your editor, you probably want to add the command “-w” to your .profile. The -w option will make geany to automatically save your file on exit which is very useful if you don’t use a usb keyboard. I have been using Geany for several years now and I find it a most useful tool for developing python projects. To use Geany, you need to install it on your Raspberry Pi. Here is how you do it.
What is geany in Raspberry Pi?
Geany is a text editor for C, C++, PHP, Python, Ruby, Java and other programming languages. It is free and open source with a user-friendly interface and cross-platform capabilities. Geany is written in C and should run on any platform for which Geany can compile.
It is best suited for people new to programming and new to Linux, and is also a good choice for intermediate programmers. Geany is a text editor for the GNOME desktop environment which is free software. It is a simple text editor with a lot of features and is available in two versions: the standalone geany and the Geany for Emacspeak.
How do you make a project on geany?
Geany is a free, open source, cross-platform programmer’s text editor with a focus on programmer productivity, and is one of the most popular editors for beginners. In this article, I will describe how to install, setup and use it on a Raspberry Pi. First, you need to install the software on the Pi. There are many different ways to do this but the most secure and easiest way is to do it through a Raspbian/Debian installer.
To install geany on a Raspberry Pi, first, you need to install Apache, Python and some libraries. If you haven’t done so already, you need to install those things first so that you will be able to start geany. On your system, open a terminal and run the following command: sudo apt-get install apache2 libpython2.7-dev python-pip python-dev libssl-dev libcrypto-dev. After installing all the dependencies, install the latest geany packages: sudo pip install geany After installing the latest geany packages, you can run geany from the command line as follows: sudo geany If you have installed geany, you can now


")


